
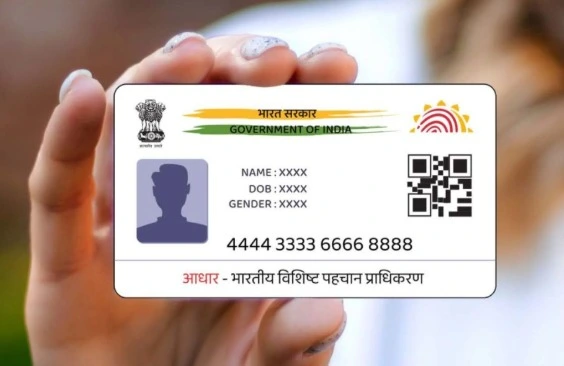
Navigate the mandatory offline enrollment center protocols, lock in slots via online appointment booking, and manage strict lifetime update limits.
Ensuring that your registered personal information is entirely accurate is crucial for avoiding service denials, financial non-compliance, and identity mismatches across Indian banking and welfare platforms. While minor details like residential addresses can still be modified directly via Aadhaar online citizen portals, core parameters—specifically your Date of Birth (DOB)—now require mandatory offline validation at an official registration hub to prevent fraudulent profile alterations.
Add rightsofemployees.com as a Preferred Source




1. Core Service Parameters and Fee Matrix
Before scheduling an update, review the structural regulations, service charges, and systemic limits set by the Unique Identification Authority of India (UIDAI):
| Operational Detail | Official Policy Guidelines |
| Submission Mode | Strictly Offline at an authorized Aadhaar Seva Kendra or Enrolment Centre |
| Online Capabilities | Limited strictly to online slot booking and real-time status tracking |
| Standard Service Fee | ₹75 for a standalone demographic DOB update |
| Biometric Bundle Fee | ₹125 (Includes mandatory biometric update paired with demographic data edits) |
| Processing Window | Typically finalized within 30 to 90 days from submission |
| Standard Correction Limit | Restricted to once in a lifetime under default processing rules |
2. Standard Proof of Date of Birth (PDB) Documents
Applicants must bring an original, valid Proof of Date of Birth (PDB) document to their physical appointment. Acceptable verifications include:
-
A valid, active Indian Passport.
-
An official Birth Certificate issued by the authorized local or state body.
-
A formal Marksheet or educational passing certificate issued by a recognized Board of Education or University.
-
A Service Photo Identity Card issued by the Central/State Government, PSUs, or statutory regulatory bodies.
-
A Pensioner Photo Identity Card or formal Pension Payment Order (PPO).
-
A Transgender Identity Card or official certificate issued under the Transgender Persons (Protection of Rights) Act, 2019.
Recent Posts
- How to Link and Verify Your Email ID with Aadhaar Online: Free App Method
- Step-by-Step Guide for Birth Certificate Name Inclusion and Required Documents
- How to Respond to an Income Tax Notice in India: Online Step-by-Step Guide
- Domicile Certificate Eligibility, Fees, and Required Documents for State Portals
- Maharashtra to Make Domicile Certificate Mandatory for Driving Licences From August 1
3. Special Documentation Requirements Matrix
UIDAI applies distinct evidentiary checks depending on your current profile history or age group:
| Case Category | Scenario Baseline | Mandatory Evidentiary Requirement |
| Case 1 | First-time correction from a generic or approximate estimated age block | Any single standard, valid PDB document from the baseline list. |
| Case 2 | Correction after a Birth Certificate was already submitted on a previous turn | An officially updated/corrected Birth Certificate retaining the identical Birth Registration Number (BRN). |
| Case 3 | Correction after an educational marksheet or passport was previously used | A formal Birth Certificate issued by an authorized municipal or local administrative body. |
| Case 4 | Resident applicant below 18 years of age | Providing an official Birth Certificate is completely mandatory. |
| Case 5 | Non-Resident Indian (NRI) applicant below 18 years of age | A valid Birth Certificate or active Indian Passport. |
| Case 6 | Post-marriage documentation detailing identity or surname adjustments | Original pre-marriage DOB evidence accompanied by legally binding marriage or name change records. |
4. Step-by-Step Update Walkthrough
Phase A: Pre-Booking Your Appointment Online
To avoid long queues, book a time slot online before heading to a center.
Online Appointment Funnel:
🌐 open myAadhaar Portal ➔ 📅 Select 'Book Appointment' ➔ 📍 Choose Location ➔ 📲 Verify Mobile OTP ➔ 📆 Pick Date/Time Slot ➔ 💳 Settle Fee Online ➔ 📄 Print Receipt
-
Navigate to the Gateway: Visit the official myAadhaar portal and select the ‘Book an Appointment’ module.
-
Define Location: Choose your local city or center location from the dropdown options and click ‘Proceed to Book Appointment’.
-
Secure Access: Select ‘Aadhaar Update’, enter your active registered mobile number, pass the CAPTCHA check, and authenticate using the incoming security OTP.
-
Target the Fields: Select ‘Date of Birth’ as the field to be corrected, choose your preferred center location, and select an open calendar date and time slot.
-
Payment and Receipt: Settle your processing fee through the integrated online transaction portal (or choose to pay cash at the counter) and download your physical appointment confirmation receipt.
Recent Posts
- How to Link and Verify Your Email ID with Aadhaar Online: Free App Method
- Step-by-Step Guide for Birth Certificate Name Inclusion and Required Documents
- How to Respond to an Income Tax Notice in India: Online Step-by-Step Guide
- Domicile Certificate Eligibility, Fees, and Required Documents for State Portals
- Maharashtra to Make Domicile Certificate Mandatory for Driving Licences From August 1
Phase B: In-Person Processing and Verification
-
Visit the Center: Walk into your selected center on the specified date, carrying your original PDB documents and printed appointment slip.
-
Form Completion: Request, fill out, and double-check the Aadhaar Enrolment and Update Form at the desk.
-
File Ingestion: Hand the paperwork to the operations agent along with your original birth or academic records for scanning.
-
Biometric Verification: Complete physical identity verification by providing your biometrics (fingerprints or iris scan) at the terminal booth.
-
Secure Your Receipt: Collect your acknowledgment slip from the executive. This receipt contains your unique Update Request Number (URN), which is essential for tracking your request.
5. Overcoming the Lifetime Update Limit (Exception Handling)
If you have already exhausted your single standard lifetime correction opportunity and need to fix another error, your request will be rejected under the automated workflow. To resolve a genuine mistake, you must access the manual Exception Handling Process managed by UIDAI’s regional offices.
Escalation Protocol:
-
Compile the Grievance: Draft a detailed formal appeal and send it to grievance@uidai.gov.in.
-
Attach Required Files: Include your clear scanned URN/EID rejection logs, your original valid Birth Certificate, and a formal written statement justifying the need for the second change.
-
Regional Assessment: An officer at the UIDAI Regional Office will evaluate the submission. If the documentation is verified as authentic and the reason is deemed legitimate, they will issue a manual override to update your records.
6. How to Track Your Request Status
You can monitor the progress of your application while it undergoes verification over the 30-to-90-day review period using two official channels:
Option A: Portal Tracking
-
Go to the official myAadhaar status tracking portal.
-
Enter your unique Update Request Number (URN) or Enrolment ID (EID).
-
Pass the security CAPTCHA validation and choose ‘Check Status’.
-
The system will display the real-time stage of your file on the screen.
Option B: IVR Helpline
Dial the official toll-free helpline number 1947 from your phone. Follow the Interactive Voice Response (IVR) prompts, enter your numeric URN or EID details when requested, and listen to the automated status readout (or ask to connect directly with a support executive).

Recent Posts
- How to Link and Verify Your Email ID with Aadhaar Online: Free App Method
- Step-by-Step Guide for Birth Certificate Name Inclusion and Required Documents
- How to Respond to an Income Tax Notice in India: Online Step-by-Step Guide
- Domicile Certificate Eligibility, Fees, and Required Documents for State Portals
- Maharashtra to Make Domicile Certificate Mandatory for Driving Licences From August 1
Add rightsofemployees.com as a Preferred Source