

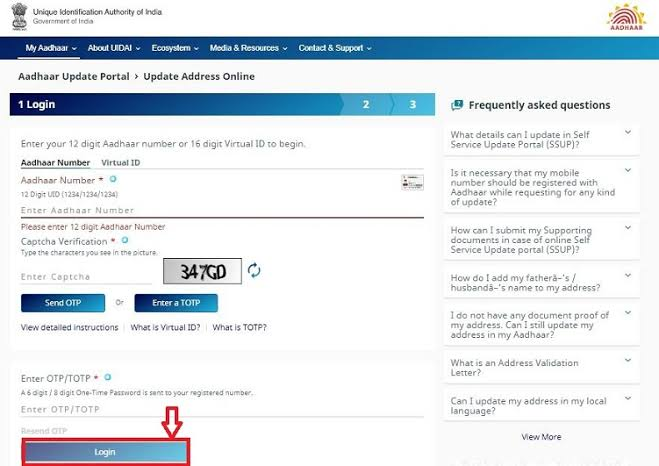
Take advantage of the limited-time, zero-cost digital update window via the official app, or utilize standard offline biometric channels.
Linking a valid, active email address with your Aadhaar card establishes a critical, secondary layer of security for your digital identity. This connection ensures you receive real-time authentication notifications, simplifies profile recovery processes, and guarantees seamless communication with the Unique Identification Authority of India (UIDAI).
Add rightsofemployees.com as a Preferred Source


To accelerate user updates, UIDAI has authorized a dedicated compliance window: from July 1, 2026, through December 31, 2026, users can modify or register their primary email address completely free of cost when processing through the official Aadhaar mobile application.
Recent Posts
- How to Respond to an Income Tax Notice in India: Online Step-by-Step Guide
- Domicile Certificate Eligibility, Fees, and Required Documents for State Portals
- Maharashtra to Make Domicile Certificate Mandatory for Driving Licences From August 1
- Switching to an EV? Delhi’s New Policy Will Pay You Up to ₹1 Lakh to Scrap Your Old Car!
- Amazon Prime Day 2026: Best Running Shoes Under Rs 3,000 From Puma, Adidas & Nike
1. Compliance Matrix: Online vs. Offline Options
Depending on your preference or the status of your current biometric details, updates can be executed via two primary channels:
| Operational Metric | Online Mobile Method | Offline Walk-In Method |
| Primary Platform | Official Aadhaar Application | Registered Aadhaar Seva Kendra |
| Statutory Processing Fee | Free (July 1 – Dec 31, 2026) | Standard UIDAI Charge: ₹50 |
| Identity Authentication | One-Time Password (OTP) Verification | Physical Biometric Authentication |
| Filing Tracking Mechanism | Update Request Number (URN) | 28-Digit Enrolment ID (EID) Slip |
2. Core Security and Operational Benefits
Failing to attach a verified email account to your identification records can expose your profile to communication gaps if your registered mobile number is lost, deactivated, or temporarily out of network reach. Integrating an email address unlocks several key operational benefits:
-
Real-Time Monitoring: Instantaneous security tracking via immediate alerts whenever your profile undergoes database queries or authentication requests.
-
Rapid Data Recovery: A simplified system retrieval process to recover lost or misplaced Aadhaar numbers and Enrolment IDs (EID).
-
Direct Broadcasts: Official, uninterrupted updates from UIDAI regarding revised guidelines, compliance shifts, and structural digital wallet changes.
3. Step-by-Step Technical Workflows
Method A: Free Online Update via the Aadhaar App
This automated routine requires access to a mobile device and a functioning internet connection.
Online App Workflow:
📲 Launch Aadhaar App ➔ 🔐 Login via OTP ➔ 📧 Select 'Update Email' ➔ 📝 Enter New Email ➔ 📩 Verify Email OTP ➔ 📝 Save URN
-
Download and Launch: Open the official Aadhaar App on your smartphone.
-
User Authentication: Log in securely using your standard identity profile details and complete the initial mobile verification via the automated security OTP sent to your phone.
-
Initiate Change Request: Locate the primary service layout and select the ‘Update Email Address’ module.
-
Data Ingestion: Type your new, active email address into the designated entry fields.
-
Secondary Verification: Retrieve the unique authentication code sent straight to that newly typed inbox, input it into the app window, and click verify.
-
Submission: Confirm and submit the finalized request.
-
Log Tracking Metrics: Note and save the system-generated Update Request Number (URN) to track the processing status online.
Method B: Verifying an Existing/Updated Email Record
Once an application is completed, you can officially check the registration database using the core web portal to ensure the link is active:
-
Navigate to the official, secure UIDAI Web Portal.
-
Hover over the parent ‘My Aadhaar’ dashboard tab and look for the ‘Aadhaar Services’ column. From there, click on ‘Verify Email/Mobile Number’.
-
Choose the ‘Verify Email Address’ option. Enter your profile credentials, the targeted email address, and the security CAPTCHA code, then press ‘Send OTP’.
-
Retrieve the incoming confirmation code from your mail app, enter it on the webpage interface, and choose ‘Submit’.
-
A successful match will immediately display a formal verification confirmation banner across the screen.
Method C: Offline In-Person Updates
If your linked telephone line is completely inactive or you run into app errors, you can update your records in person:
-
Locate an Office: Head over to the nearest authorized Aadhaar Seva Kendra physical location.
-
Complete Paperwork: Ask for, fill out, and sign the official Aadhaar Enrolment and Update Form, making sure to write down your new email address clearly in the designated text box.
-
Biometric Sign-Off: Hand the completed form to the desk agent and complete the processing routine using standard biometric verification (fingerprint or iris scan).
-
Clear Fees: Pay the standard demographic processing fee of ₹50 directly at the payment counter.
-
Collect the Receipt: Make sure to get your official printed acknowledgement receipt. This slip holds your unique 28-digit Enrolment ID (EID), which you can use to check your profile update status later on.


Recent Posts
- How to Respond to an Income Tax Notice in India: Online Step-by-Step Guide
- Domicile Certificate Eligibility, Fees, and Required Documents for State Portals
- Maharashtra to Make Domicile Certificate Mandatory for Driving Licences From August 1
- Switching to an EV? Delhi’s New Policy Will Pay You Up to ₹1 Lakh to Scrap Your Old Car!
- Amazon Prime Day 2026: Best Running Shoes Under Rs 3,000 From Puma, Adidas & Nike
Add rightsofemployees.com as a Preferred Source